Control
Flashing the Flysky/Turnigy 9X with ER9X
This is a tutorial of how I flashed and setup my transmitter for use with MultiWii and Ardupilot, more information can be found here.
You will need to be sure that you have access to an ISP programmer in order to flash the firmware of the transmitter. I use the Sparkfun Pocket AVR Programmer but there are plenty of alternative programmers to use such as this one.
To start, I removed the rear case of my transmitter and disconnected the primary cable harness. I soldered the leads from the programming cable supplied with my programmer directly to the pads on the pcb. The following diagram shows the correct solder points for the cable harness.
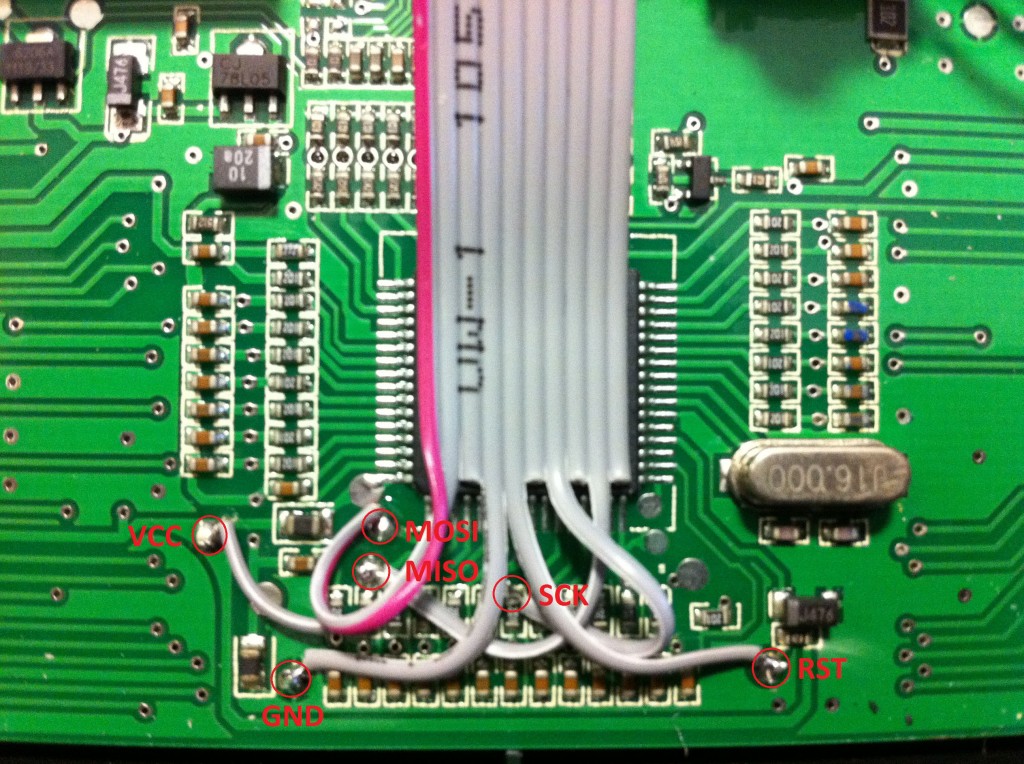
After soldering the cable harness, it is vital to check all connections before connecting the programmer to your computer and attempting to program the transmitter.
Download the latest er9x.hex firmware binaries here.
Download and install eePe from here.
Connect your programmer to the transmitter and computer, launch eePe and follow these steps:
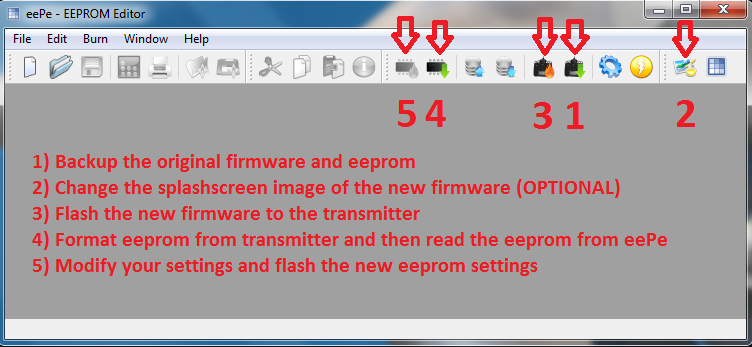
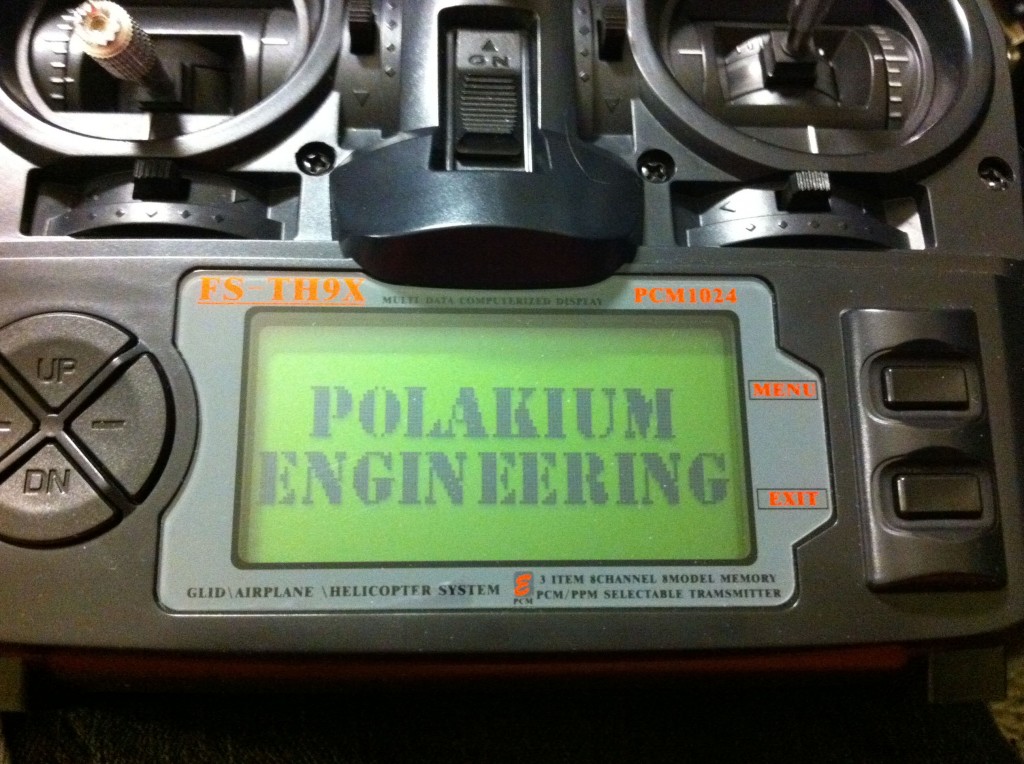
Now your transmitter should be flashed and functioning with ER9X firmware. If you ever have any issues with the firmware try to erase the eeprom or flash it again using eePe. It is much easier to program mixes and setting from eePe by following steps four and five above. For information regarding the specifics of mixing and the user interface get the manual here. Be sure to correctly follow the steps to calibrate your stick positions and variable knob ranges.
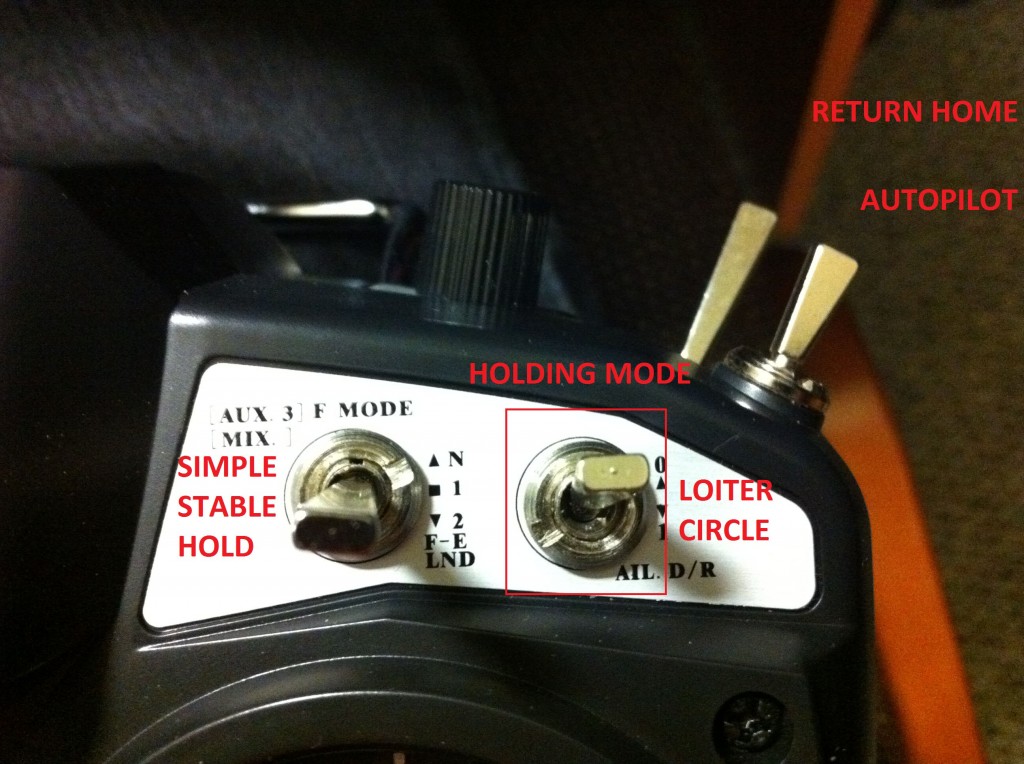
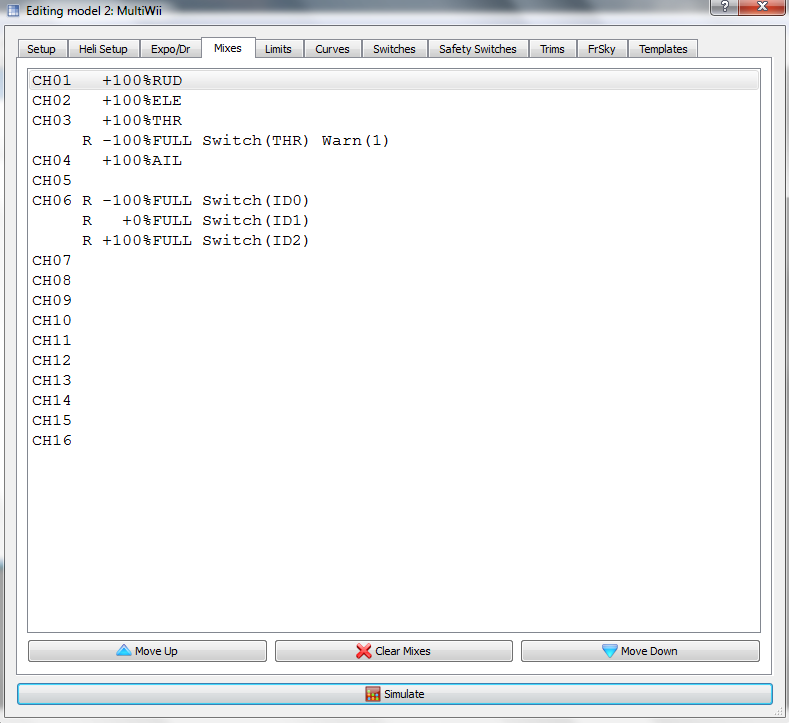
For Multiwii I setup throttle hold and configured the three position switch to output high/med/low to channel six. This can be used to change between flight modes.
For Arducopter I have configure my radio with throttle hold and six modes that are all output to channel six. Keep in mind that the value of each mode should have a pulse width that falls somewhere in the following range and the mixing percentages should be adjusted accordingly.
1165 – Mode 1
1295 – Mode 1
1425 – Mode 3
1555 – Mode 4
1685 – Mode 5
1815 – Mode 6
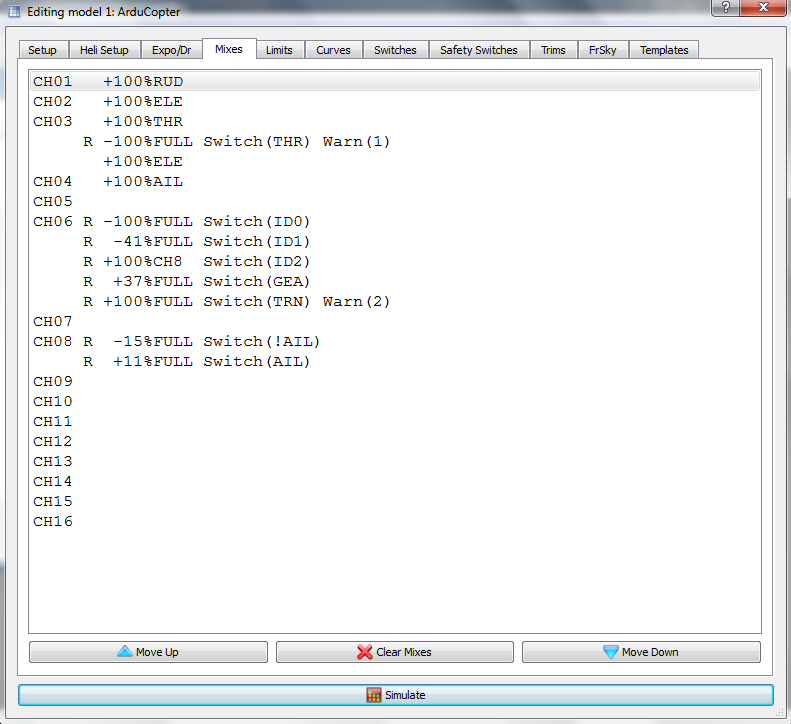
The final results of the mixing are as follows:
